Tuesday, March 31, 2009

Backing: You Will Be Glad You Did This!

You might be asking "what is backing and why would I need this?"


Backing, sometimes called blocking is when a piece of wood in mounted between two studs or two ceiling joists. This can be done during framing of a new home or during an addition to an existing home, or during a renovation when the demolition exposes the studs and ceiling. The piece of backing or wood needs to be flush with the studs so there is a smooth surface when dry wall is applied.

Backing gives stability to whatever is mounted into the walls. Your carpenter will be one happy person when he or she realizes there is backing behind the drywall when installing an item during construction or hanging an item after you have moved in. Backing is something that needs to be discussed with your builder before your framer begins framing your home. If using an interior designer, it is a good idea that they be included in this discussion. Below are numerous items that would benefit from backing.


The tapestry shown above is approximately 6' X 8' in size and is substantial in weight. To be able to screw the decorative hooks that hold the tapestry into backing will insure a much more stable mount than just mounting the hooks directly into drywall.


A mirror such as the one shown above is extremely heavy. Often a 1' X 4" board is mounted on the outside of the wall and screwed into a stud to insure stability. An easier solution is to have backing in the wall underneath the drywall.


A pot rack is another example of something needing backing. A chandelier would need backing as well unless either of these are mounted in a joist. Again, talk to your builder to discuss what you might be hanging and where.

Any kind of shelving unit needs backing whether it is a shelf to hold a heavy bust or a shelf used to hold picture frames.


A discussion about backing with your audio/video team is recommended. Where will televisions be mounted? What about stereo speakers?


Towel bars, towel rings, and towel hooks all need backing behind them, especially if you have young children. I know I have seen a towel bar pulled out of the drywall on many occasions.

Like the towel bar, I highly recommend that toilet paper holders be mounted into backing. Over time, the subtle movement applied when using toilet paper in addition to the movement applied when swapping out a roll will affect the stability of a toilet paper holder that is mounted only into drywall. A toilet paper holder mounted into backing is much more secure.
Backing is ideal for securing the shower curtain rod.


If you plan to add storage cabinets mounted into the wall over the toilet you will want backing in that wall.


Handrails on staircases should be mounted into backing to insure a tight mount. If you expect to have an elderly relative move in or if you think this is the last home in which you will live, add backing to both sides of the stairs. When you add that additional handrail, it too will have a secure mount.
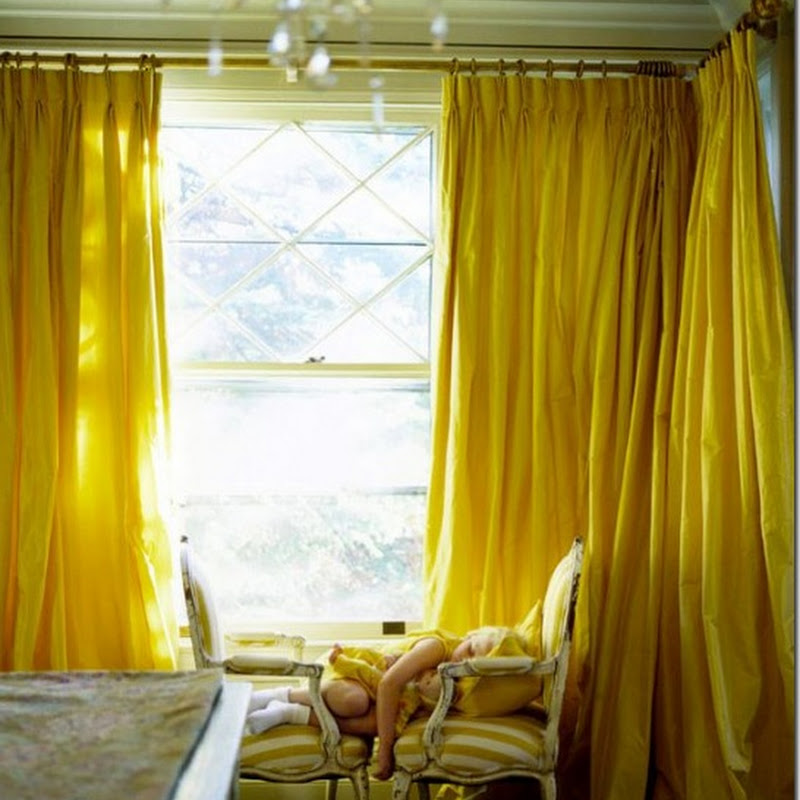
The weight of window curtains can be quite heavy especially if they are lined and if a heavy fabric is used. Because they can be opened and closed daily, it is imperative to have backing in the wall where the curtain rod will be mounted to insure stability.


Whether you hunt trophy deer, elk, caribou, or other type of game or if you are a fisherman catching trophy fish and you plan to mount them on the wall, plan ahead for where these trophies will be mounted and put backing behind the drywall.

(The white tail deer trophies shown in this photo are my son's, hunted with a bow and arrow. The meat is eaten.)


Because of the weight of the coats, purses, etc. and the pulling motion to remove coats, purses, etc. adding backing behind the drywall is a smart thing to do.


A few items found mounted on a garage wall include bicycles, kayaks, and tennis racquets. Make a list of what you might hang on your garage wall and discuss backing options with your builder. You may even decide on some type of wood walls. In this particular garage there is a wainscot of beadboard with drywall above, so backing was needed behind the drywall.

Saturday, March 28, 2009

Bookcase Lighting: Mistakes to Avoid

Before I list the bookcase lighting mistakes to avoid, I realized I left off one option for bookcase lighting on my last blog. That option would be to light the bookcase from a recessed can light mounted in the ceiling several feet out from the bookcase. There are various types of canned lights from which to choose.

Bookcase Lighting Mistakes to Avoid

1. Make sure your electrical plans indicate the kind of bookcase lighting you plan to install and pay close attention to the location.

2. Make sure the size and shape of the lighting fixture is adequate enough to cast enough light to illuminate your bookcase. You will also want to make sure the scale of the light fixture is in line with the scale of the bookcase.

3. Determine that once mounted, how many shelves below will the lighting fixture illuminate?

4. Determine if it is important to you that the lighting fixture and the arm of the lighting fixture be able to move around so that you can adjust the lighting?

5. If your bookcase almost reaches the ceiling in height, make sure when mounted, the lighting fixture you select does not project to high upward and end up hitting the ceiling.

6. When selecting a light fixture that mounts into your bookcase, make note of how far it will project out from the bookcase once mounted. The projection will need to relate to the size of the room and the size of the bookcase.

7. If you have stereo equipment such as a receiver, CD player, etc. located on your bookcase shelf, make sure there is enough light to illuminate the dials and buttons so you can see to operate the equipment.

8. If using rope lighting, make sure when installed and you are seated in the area, you cannot see the actual rope lighting. Being able to see it takes away the aesthetic quaility of using rope lighting.

9. Realize if you use a recessed canned light or puck light installed above the top shelf of the bookcase, it will only provide light for that top shelf. Even if you use glass shelves, the objects on each shelf will block the light from traveling below. A solution is to have a puck light mounted underneath each shelf so that it will light the shelf below. However, a skilled electrician and carpenter will need to work together to create an aesthetically pleasing mount. Another solution is to use rope lighting for the lower shelves.

10. Take time to think through where you will locate the light switch(s) to turn on the bookcase lighting. Will you want to use a three-way or even a four-way light switch allowing you to turn the bookcase lights on at each entrance to the room with the bookcase and have a light switch hidden within one of the shelves? Will you want a dimmer switch on each light switch?

11. Will you place a small lamp on one of the bookcase shelves? If so, plan for an outlet. Will you want to be able to turn that lamp on and off at a light switch instead of having to walk to the bookcase each time you want to turn it on and off.

Remember Earth Hour is Saturday March 28, 2009, at 8:30 pm local time wherever you live on planet earth. Join in and turn your lights out for one hour.

Thursday, March 26, 2009

Options to Consider When Selecting Bookcase Lighting

Whether you want to illuminate a bookcase so that you are able to read the titles in order to find a particular book or you want to illuminate beautiful collections you have on display, or to add extra light to a particular area of a room, there are several options to consider when selecting your book case lighting. Option one is the external mounted fixtures. Option two is using rope lighting along the frame of the bookcase or under the bookcase shelves. Option three is to use recessed canned lights or puck lighting above each shelf. Additonally, depending on the fixture you choose, you have various options as to how each is mounted. Some can mount into the bookcase itself, others in the wall above the bookcase. Some have a decorative mount that is visible while the mount in others is hidden. You will also want to pay attention to the distance the fixture projects out from the bookcase once mounted. The further out it projects, the more shelves it will illuminate. However, there is an aesthetic balance between the size of the bookcase and the size and projection distance of the light fixture. One more choice to make is the of material and finish, which is simply a personal preference.

What I like about the external mounted fixture in the photo below, unlike the fixture in the next photo, is the width of the light fixture illuminates the entire width of the shelf. Note this fixture is mounted into the top of the bookcase with the mount hidden from sight.


Looking carefully the at the photo below, you will see the bookcase light fixture matches the art light. This does not have to be the case though they need to compliment each other. Also, the width of the light fixture above the bookcase is a bit narrow realated to the width of the bookcase.


You will see matching fixtures for the bookcase and for the art in the photo below. Note the bookcase fixtures are mounted above the bookcase. (photo from Beautiful Homes Fall 2008)


In the photo above it appears the fixutres are mounted into the top of the bookcase with the mount completely hidden from sight. (photo from Trends, date unknown)


Above is another style of a bookcase lighting fixture. The arm on these fixtures curves and it appears the angle of the light can be adjusted. The mount is visible but tasteful.
The fixtures used in the photo above have a more decorative appeal with a decorative mount. Hopefully, both the arm of the fixture and the light itself adjusts up and down.

Yet another decorative type fixture is shown in the photo above. There seems to be an elbow in the arm of this fixture which will allow you to adjust the angle in which the light shines. Most likely the light fixture itself is adjustable, too.

The bookcase in the photo above appears to have used rope lighting placed just inside the outer stiles of the bookcase which gives a soft glow.


In the photo at right are small recessed canned lights mounted in the top of the bookcase as well as used to light the art on both sides of the bookcase.


I took these two photos in a home I visited that was under construction. The lighting fixtures were so sleek and blended into the bookcase. I did not see these illuminated so I am not sure how much light they projected. I just noticed the date on the photograph is 3-16-98. I cannot believe I took these over ten years ago!

(The source of many of the photos used in this blog is unknown. If this is your photo, please contact me and I will add source or remove.)

Monday, March 23, 2009

Shower Shelves: Mistakes to Avoid

My last blog consisted of twelve photos showing an array of shower shelves. Being a fan of shower shelves and recommending them, there are a few mistakes you want to avoid.


1. Adequate shelf space to hold all of your items. The height, length, and depth of the shelf needs to accommodate the items you will store on the shelf. Take an inventory of all items you use in your shower. If you purchase super-sized products, measure those products and make sure you specify that the FINISH height, length, and depth meet the measurements you provide.


2. No water puddling on the shelf. The shower shelf should have a ever so slight tilt away from the wall to prevent water from puddling along the wall and in the corners.


3. Avoid having the shower spray direct on the shelf. The relationship between the shower shelf and the spray from the shower head(s) needs to be noted. You do not want the flow of your shower head to hit the shelf. I have found that shower shelves on the wall directly below the shower head do not get much water.


4. Access to the shelf if sitting on your shower bench. If you will have a bench in your shower, make the shower shelf accessible to the person sitting on the bench. You may need to have two separate shower shelves, one to hold items used when showering and one for items used when sitting on the bench.


5. Think twice about the material you will use. I would be reluctant to use glass shelves as keeping the water spots off would become a never ending chores.


Faith Makes All Things Possible, Not Easy (as seen on a church sign in Nashville)
Blessings ...Susan Lang

Wednesday, March 18, 2009

Shower Shelves, Which do you prefer?

Today's blog includes a dozen photos of shower shelves. Please leave a comment telling me which is is your favorite one and why and anything else you might want to say about shower shelves.


SIZES There are many sizes, shapes and materials to use when designing your shower shelf. The size should be determined by the number of products you expect to place on your shelf. Usual items might include several different shampoos and conditioners, shaving cream and razor, shower gel, a soap dish, and a sponge. If you buy these products in bulk sizes, makes sure you measure the height and diameter so that your specific product will fit.

SHAPES Shown below are different shapes to consider. Some shelves are square, others are rectangular. There is even two, three, and four stories tall shelves and one shelf is an arch. Your shelf can be inset into the shower wall or applied to the outside wall.


MATERIALS You will notice a wide array of materials used. Some materials match the stone or tile used on the wall, other material compliments the stone or tile used on the wall. Some materials are stone or tile pieces and some use custom slabs. There are even glass shelves in two of the photos.


Please realize there are many choices in size, shapes, and materials from which to choose.


To the left is a two story shower shelf inset into the shower wall. The actual shelf is made of glass. Of interest, note the small bench attached to the wall below the shelf.


I find this shower shelf to be way too small. I do like the actual shelf protruding out a bit from the wall. I also like the stone depending on the type of home in which it is used.


This photo show multiple sheves made of glass. I cannot tell if they are adjustable. They used a different tile for the wall behind the shelf which compliments the other stone nicely.


This homeowner used custom slabes of stone as an accent stone for the shelf as well as the back wall of the shelf. These match the custom slab used for the bench. I like the contrast between the dark marble and the lighter stone.

What you cannot see is the floor is also made of a matching piece of custom stone that has been shaved and scored with lines to allow water flow towards the drain. Although great looking, I think large tiles or a slab on a shower floor is dangerous because there is no grip for you foot and you can easily slip.


I find this long narrow shelf to be quite stunning. However, I think it loses out in the function over form department. The shelf does not appear tall enough for many products found in a shower.
I do like what I assume to be is a fogless mirror that was added to the wall.
I do like the design of the bench below the shelf.
My tear sheet from a magazine is so small, I cannot make out what the two vertial bars are at the end of the shower. Do any of you know?


Here is another photo taken at a friend's home to demonstrate size and materials.


This is a friend of mine's son's shower. I like how the inset for the shower shelf is the exact size of the slate tile. However, I think this 12" square size is too small and there should have been two shower shelves. I noticed the slate absorbs quite a bit of water which is what the dark rose color is beneath the shower shelf.


This is a tear sheet out of a magazine showing multiple shelves which are different heights. I like the added depth to these shelves as well as the overall clean look. I would have liked to have seen the shelves fit into the exact size of the pieces of tile on the wall.

Note the small diagonal bench. I find the crown molding just above the windows to be in an interesting location. Not sure why it was not applied to the top of the wall. I think the dampness of a shower on the wood, unless this is located in a dry climate will create extra maintenance for the homeowner.


Quite a nice statement with the decorative tile framing the shower shelf.


The design of this shower shelf with the basket weave pattern for the back wall of the shelf and the arch or cathedral design of the cut out for the shelf is a wonderful touch. However, I do think the amount of shelf space is too limited.


Another friend's shower, the size was determined by the two 12" square tiles used for the back wall of the shelf. This shelf has a generous depth as well.


Yet another friend's shower, she chose to apply her shelves outside the shower wall in the corners using an accent piece.

Tuesday, March 17, 2009

Mistakes to Avoid: Dinner Plate Storage

As promised in my recent blog DINNER PLATES: Options for Storage, I am blogging about the mistakes to avoid when designing where you will store your plates in your dream kitchen.

I. Upper Cabinet Shelf If you choose what is the most common method for dinner plate storage, the upper cabinet shelf, you will want to measure the diameter of your dinner plate and specify that the upper cabinet depth with the cabinet doors closed be that measurement deep. You would be quite surprised at how often a person who has remodeled their kitchen or built a new home with their dream kitchen moves in only to learn their plates are too big for the cabinet door to close tightly. The old standard measure for upper cabinet shelves was approximately 12" deep. With everything becoming oversized, including our dinner plates, the plates have grown but the standard cabinet shelf depth has remained the same. If you were to look at your grandmother's dinner plate, you would think it was today's salad plate!


II. Vertical Plate Storage If you choose vertical plate storage, (1) be sure to measure the diameter of the plate you are storing to make sure the plate will fit the opening specified on the drawings. Do not make this too snug of a fit as you will need space to lift the plate in order to clear the rail that holds it in place. (2) Use this same measurement for the depth of the storage slot. (3) Additionally, measure the height of your plate if it was place on a counter to make sure the distance between the slots is sufficient. (4) Identify the number of plates you will be storing making sure there are enough slots specified to hold your plates. (5) If using two tiers of vertical plate storage, decide if you want the upper tier a little shorter for salad plates or do you want both tiers the same height. I recommend if using two tiers that the larger plate be stored in the bottom tier.

.

The location of the plates should be near the dishwasher for easy unloading or near the dinner table for easy table setting. Do not locate the vertical storage shelf too close to the stovetop lest all of your places will be coated by the odors emitted from the stove. (7) Do not store the plates too high for safety reasons. (8) Do not store the plates above a microwave or appliance garage. You want an open counter below the plates to be able to stack them when taking them down or to place a stack before individually putting them in the slot. (9) I would refrain from storing the plates over a sink, as shown in one of the photos, as the steam from using the sink will coat them. Also, depending on the plate size, you could bump your head.


III. Drawer Storage I like the idea of a device such as a peg or dividers to hold plates in place in a drawer so the stacks don't move when opening and closing the drawers shown in the picture below. Look at the bottom of the drawer and you can see the peg board which gives you the flexiblity of moving the pegs to accommodate your plate sizes. You will want your plates stored in the top drawer underneath the counter so you will not have to bend down too far. Also, do not make the drawers too large because in time the weight will stress most drawer glides. Instead of one large drawer consider two or more smaller drawers depending on how much china you are storing.
IV. Pull out Shelves Behind Cabinet Doors I am not a fan of pull out shelves for one main reason. In order to pull them out even a short distance, the cabinet door or doors must be fully open. If not fully open, the shelf will ram into the cabinet door creating marks. See photo below how the door is fully open.


Thursday, March 12, 2009

Storing Glasses in a Drawer

My last blog discussed options for storing dinner plates. Linda from the blog Lime in the Coconut commented that she stored her glasses in a drawer. I wanted to share two tear sheet photos I have showing glasses stored in a drawer.

There are several reasons that come to mind why a person would want to store glasses in a drawer instead of an upper cabinet.

1. No upper cabinets. One client who was building a home in the mountains of Colorado wanted a large window in his bar as the view was magnificent. This particular bar was two parallel counters; one where guests would sit facing the window with the view and the other counter was under the window. This left no upper cabinets or upper racks to store glasses without interferring with the view. The solution was to put the bar glasses in drawers under the counters.

2. Handicapped people. A person in a wheel chair or with shoulder problems would have easy access to glasses stored in a drawer.

3. Dwarfs and shorter people. Dwarf people (4'10" and under) are unable to reach for a glass in an upper cabinet in the common kitchen. Some people who are relatively short in height also have a difficult time reaching for a glass in an upper cabinets. In both cases, drawer storage for glasses and other items is a perfect solution.

4. Children. Storing plastic cups for children to use in a drawer allows the child to get his or her own cup and if old enough, they can fill it from the refrigerator door or water dispenser on their own.

May your day be filled with Blessings. ...susan
Warning: If you store glasses in a drawer and you have children in your home or children are frequent visitors to your home, make sure you have a child safety latch on your drawer.

Disclaimer: Pictures used in this blog are from tear sheets I have collected for years. Unfortunately, when collecting these, I did not note the source of the picture. I will be happy to add the source of the picture if contacted or remove it if necessary.

Tuesday, March 10, 2009

DINNER PLATES: Options for Storing

The most common location for storing dinner plates is to set them on the shelf in the upper kitchen cabinets usually located near the dishwasher or close to the eating area. However, dinner plates can be stored vertically in a plate holder usually located in the upper cabinet, in a lower cabinet drawer, or in a pull out shelf located behind an upper or lower cabinet door. Depending on possible limitations a homeowner might face, especially in a remodel, knowing you have options is a good thing.


Reasons for deviating from the common upper cabinet shelf location could range from wanting to add windows in a kitchen thus eliminating the upper cabinets on that wall to demo-ing a wall in order to open up the kitchen into the existing family room, again eliminating the kitchen cabinets on that wall.


Enjoy scrolling down through the pictures of dinner plate storage options I have torn out of various magazines over the years. In my next blog I will discuss mistakes to avoid no matter which storage option you choose.


May Blessings Come Your Way. ...Susan Lang

Dinner plates stored in a double tier vertical plate holder Dinner plates and salad plates stored in a vertical plate holder


Dinner plates stored in a vertical plate holder


Dinner plates stored in a built in plate holder located above the kitchen sink


Dinner plates stored in a built in a vertical plate holder


Dinner plates stored in a lower cabinet drawer


Dinner plates stored in a lower cabinet drawer


Pull out shelves located behind lower cabinet doors


Pull out shelves located behind upper cabinet doors