Sunday, May 10, 2009

Spiritual & Inspirational Sunday

Welcome to the second quote for Spiritual & Inspirational Sunday. For the past 25 years, I have collected quotes that inspired me. These quotes may be of a religious, spiritual, relationship, sports, or business nature My hope is the weekly quote will resonate with you causing you to pause for a minute and reflect. Perhaps you will share it with that person who is in need of reading this very quote.

“The most important

conversations I will ever have

are the ones I have with myself,

about myself.”

What I have learned through the years is to make sure the thoughts that occupy my mind are positive and healthy. None of that stinkin thinkin! I need to control the conversation that goes on between my own two ears. If I find myself obsessing over some person, place, or thing, then I need to replace those thoughts by making a list of those things for which I am grateful or making a list of my positive qualities. 

Please leave a comment telling me how this particular quote resonated with you and/or share your favorite quote.  Blessings.  …susan

Source: I heard this from John DeFoore in the early 1980’s, an incredible man from Boerne, Texas. I am not sure if it originated with him or if he borrowed it from another person.

Thursday, May 7, 2009

Using Your Jewelry as a Decorative Accessory

If you have some fabulous pieces of costume jewelry (I don’t recommend using the real stuff as it just would not be safe), why not use those pieces as a decorative accessory in your bedroom, bathroom, or closet? What’s more, these ideas shown in the photos below will help remind you of what you have… (aren’t we all guilty of forgetting about some of our pieces that are tucked away in a box in a drawer?)…give easy access to those piece…(aren’t you sometimes in a hurry and don’t have time to dig for the piece you want to wear then throughout the evening you wish you had it on?) … and give you a place to store your jewelry (isn’t this a better option than being hidden away in a drawer or jewelry box?).  I have a few pieces of costume jewelry that were my mother’s and I would love to be able to see them on a wall or on a mannequin. This is on my “to do” list.

Now I must confess this was not my idea. My friend Loicka in Jackson, Mississippi did this in her bedroom. She bought two shadow boxes from the crafts store.  She added some padding covered with  fabric to the back of the box. Then she hung some of her interesting and colorful jewelry to the box and hung both boxes on her wall.  The fabric in the back of the box allows you to customize the color you want to use and the padding gives the pins used to mount the jewelry something to stick into.  You have a choice of hanging the boxes vertically or horizontally.

DSC00462

Once hung, the boxes look like a piece of art on the wall. Notice below the glass cover is hinged and can easily be opened when you want to wear a piece. 

DSC00463

Another great idea is to use a mannequin as a design element and a place to store necklaces, bracelets, belts, scarves, headbands, and even a couple of handbags if you were to use a mannequin with arms and hands…oh and if the hand has fingers, you can add some rings.   You might even add a hat. I like the idea of grouping three in the corner.  The stand on which the mannequin rests could be custom-made of wood, iron, or some other material of your liking.  (Source of photo unknown)IMG_0001

Below:  How cool are these 18-inch miniature mannequins that can be placed on a dresser or other piece of furniture, bathroom counter, or even on a ledge in your closet?  According to the article in House & Garden November 1999, (yes, I have tear sheets that old and older!) these belonged to Houston Philanthropist Linda Finger who created jewelry from vintage tassels and ribbons and has dressed these mannequins in antique garments. She was known to use these as centerpieces at her dinner parties. 

IMG_0002This post will not be followed with the usual Mistakes to Avoid post. However, if you are remodeling or building your dream home and plan to use any of these ideas, be sure to illuminate the mannequin(s) with a spot light. Be careful illuminating the shadow boxes as you want to make sure it does not reflect off the glass.

Leigh from Australia has the blog The Brabourne Farm and she recently did a post on mannequins. Click here to check it out.

BTW: I am traveling the next eight days and I will have limited opportunity to use my computer. I may not be able to publish a post next week, but will try my best.

First, I am headed to Greenville, SC to be there with my daughter who is having surgery to repair veins in her leg from back-to-back pregnancies. Please pray that the surgery is successful, her pain will be manageable, and her recovery will be swift. (thanks)  The silver lining is I will be spending time with my two youngest grandbabies, Allie who will be two in July and Blake who will be one in July. 

From Greenville, I go to the small town of  Monterey, TN which is located on the Cumberland Plateau 80 miles east of Nashville. My neighbor, who is an international floral designer, has offered to do a floral demonstration for my friend who is hosting the Monterey Garden Club. Some of the surrounding area garden clubs have been invited to attend. I will take photos and do a post for all of you to see his talents and life in a small town on the “Plateau”.

I return to Nashville long enough to grab my luggage and catch a flight to New York City. I am attending a three day Biosignature Seminar which is on nutrition and fat storage hosted by Coach Charles Poliquin. Coach Poliquin is a strength and conditioning coach who has medaled more Olympic athletes than any other coach in the world. These athletes performed in 17 different Olympic sports. He also works with professional athletes. I met Coach Poliquin in Nashville two years ago and assisted him in a 3-day, 125 patient study he conducted on fat storage in the body. I promise to create a post on what I learn that might benefit you.

Wednesday, May 6, 2009

Staircase Railings: Mistakes to Avoid-I forgot this one!

Hi! I just realized I forgot to mention an important mistake to avoid in my previous post.  Please forgive me!

Make sure the design of the staircase railing will allow you to install a child’s safety gate at both the upper and lower level of the staircase to prevent children from climbing the stairs.  Many parents and grandparents use a removable gate.  These gates are also used to prevent dogs from going up or down the stairs.

An alternative to the removable child’s safety gate is to have a custom gate made to match the staircase railing. When not in use and left open against the wall, this gate can be a decorative element to the staircase.

The custom decorative gate works well if you are hosting any type of open house or party and you do not want guests going upstairs.

Monday, May 4, 2009

Staircase Railings Part Five: Mistakes to Avoid

Welcome to the final post on staircase railings series. There are a couple of very important mistakes to avoid listed below. Many of the other mistakes listed are of an aesthetic nature. My goal is to present information that will prevent you from making any of these mistakes.

Most people do not realize the many choices they actually have when it comes to their staircase. One thing that is avoidable is for a homeowner to move into their home and be disappointed in the location of the newel post, the width of the staircase, the size of the tread, etc. These are all things that can easily be customized if the homeowners wishes had been known to the architect.

1. Make sure the distance between each spindle or baluster meets the requirement set forth by the building codes department. Also, the height of the railing must meet the building code requirement.

You do not want a child’s head to become stuck between two spindles or your pet’s head either.

2. Before deciding on an elaborate ornate design, consider the effort it will take to keep it clean. You don’t want a beautifully designed railing to be full of dust.

A good analogy is the wheels of a car. Some of the best looking wheels are intricate and to look their best need to painstakingly be cleaned by hand. Due to time and budget constraints a car owner will find they often drive around with somewhat dirty wheels.

3. If selecting an iron railing and adding a brass design element, keep in mind that the brass will occasionally need to be polished.

4. If any part of your handrail is attached to the wall, make sure there is backing in that wall for maximum support. See previous post on backing here. It is a good idea to add backing to  both walls so if an additional handrail needs to be added, it will be securely attached to the wall.

5. Be specific regarding the location of the newel post.

You have several options: Attached to the floor, on the first step, second step, third step, built into a step, etc.  Click here to see some of the options.

6. Be specific in stating whether you want an iron handrail or a wooden handrail (or other material).

If  your staircase railings will be iron, let your architect, designer, or builder know your preference on railing. You don’t want any assumptions. Click here to see iron handrails and click here to see wooden handrails.

7. Be specific regarding the circumference of the spindles or balusters and their shape.

You don’t want anyone making assumptions regarding what you want.

8. If your staircase will have a landing at a turn, make sure the width of that landing will accommodate any furniture you plan to move to upper floors.

9. Spend time noticing and measuring the width of your friend’s staircases so that you have an actual visualize on the width you desire.

10. Make sure the height of all rises is consistent from the first step to the top step.

I was in a home where the height of the riser changed at the landing midway up the stairs which throws off the cadence you have developed in your step thus having the potential to cause a fall. 

11. Specify whether you want an open sting(er) or closed one. Click here to see photos.

12. If you are a big footed family and need deeper treads, let your architect know before drawing the first floor plans so extra space can be allocated for the staircase.

13. If you want any type of lighting on the riser or tread make sure that is specified.  Often lights are placed in the staircase wall but in some cases the stairs have a lighting detail.

Feel free to leave a comment, I love hearing from you! …susan

A Tidbit on Monday: What Swine Flu Precautions Have You Noticed?

Welcome! This post is a departure from the usual DESIGN content of my blog.  Today and in the future, I plan to post a TIDBIT here and there as it comes about.  I hope you will enjoy whatever it might be.

I attend an Episcopal church. Yesterday, before giving communion to the congregation, which involves receiving the round wafer and then sipping wine from the chalice, my preacher mentioned the swine flu fears. He reminded those who would prefer not to sip from the chalice that they could dip their wafer into the wine instead.  I thought that was interesting.

Then, this morning after my wonderful yet grueling workout, I stopped off at my favorite bakery to treat myself to some decaf coffee mixed with a couple of hits of the cinnamon hazelnut caffeinated coffee. Taped on the wall of the glass cabinet which has warm and delicious blueberry, cranberry, banana nut, chocolate mocha, and chocolate swirl muffins behind it…yes, they were all begging me to take them home but my discipline prevailed this time,  was an 8 1/2 X 11” piece of paper with the following message:  DUE TO OUR CUSTOMERS WORRYING ABOUT CATCHING THE SWINE FLU, WE ARE TAKING OUR EMPLOYEES TEMPERATURES WHEN THEY ARRIVE FOR WORK.  I paused and then read it again! Is this more serious than I am allowing myself to believe?

I am curious as to what type of precautions you have noticed in your area?Please leave a comment and tell me.

BTW: here in Nashville, Tennessee where I live we have had two schools decide to close for a week because one school has two suspected cases of the swine flu (one case was just confirmed) and the other school having one suspected case.

Sunday, May 3, 2009

Spiritual & Inspirational Sunday

Welcome! Today I will begin a weekly post called Spiritual & Inspirational Sunday. For the past 25 years, I have collected quotes that inspired me. These quotes may be of a religious, spiritual, relationship, sports, or business nature My hope is the weekly quote will resonate with you causing you to pause for a minute and reflect. Perhaps you will share it with that person who is in need of reading this very quote.

“You cannot have a happy ending to an unhappy journey”

I have learned that every moment is a part of my life’s journey. Whether I am going to the post office or the grocery store I need to be happy and enjoy every minute of that particular journey. When I am in a hurry, feeling anxious, or in my head, I am missing the journey. I am at my best when I take time to observe the beauty around me and enjoy and engage those people I come in contact with on my journey. Blessings  …susan

Source of quote: Esther & Jerry Hicks  Abraham-Hicks Publications  9-13-1997

If you are so inclined, please leave a comment expressing your own thoughts and inspiration after reading this quote.

Friday, May 1, 2009

Staircase Railing Series Part Four: Newel Posts & Other Design Elements

Whew! Did you realize up to this point we have climbed 52 sets of stairs! If each staircase averaged 20 individual steps, we have climbed over one thousand steps, (1,040 to be exact)!  Let’s quit climbing and take a look at some design element options you might want to consider for your own staircase.

I realize some of you reading my blog are architects, interior designers, and builders who speak a language and use terms that can intimidate others who read my blog. I tend to write my posts in descriptive layman’s terms so that all can understand. Quite honestly, there are times when I am puzzled by a term. I try to figure out why it is called what it is called and unsure of how to use the term. For instance, in the illustration below is a face string or face stringer as I have seen it also called. I am do not understand how the word string or stringer applies. If you know, please comment. There are times when I am not sure of the proper design term to use and do not have time to do the research. Scanning photos, then downloading them, then uploading to my post does take quite a bit of time, so please forgive me when I do goof. Feel free to leave a comment and correct me when necessary.

I happened upon a book I own titled The Visual Dictionary of American Domestic Architecture by  Rachel Carley which is full of illustrations showing readers how to identify and describe a given style. The illustrations also show different design elements and identifies the proper term for that element. Below are three illustrations found in Rachel Carley’s book which will help you identify the staircase terms. These are Queen Anne styles.

IMG_0006  IMG_0016 IMG

Besides the illustrations shown above, I came across two internet sites with illustrations and a glossary of staircase terms that may also be of help. Click here and here, too.

 IMG_0001

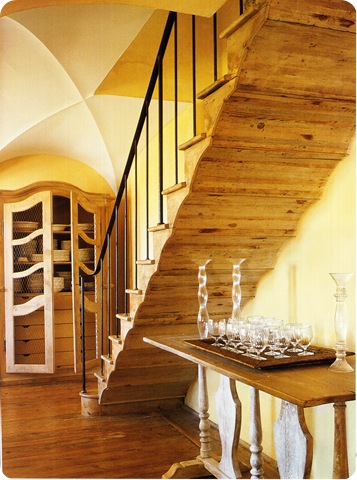
Isn’t the photo above a cool design. I think the staircase above looks like an optical illusion? How the heck is the “stack” of stairs supported?
 

IMG_0002

^How do you like the design of this staircase? What a beautiful underside and the wood is divine. I think it is a grand architectural design element for a home.

Source: Veranda March/April 2007^

 IMG_0019

IMG_0020

I am loving the distressed look of the face string and the outside of the riser on what appears to be a very traditional staircase in the two photos above. Also the finish on the spindles.

IMG_0018

^The stained wood design on the outside of the tread above really stands out on the white paint.  Also, be sure to pay attention to the panels on the underside of the staircase.

IMG_0182

^Yet another example of a design element on the outside of the tread.

IMG_0008

The newel post above makes quite a design statement. It is hard for me to tell in this photo but it appears there is a design element that follows the design of the newel post on the face string of this staircase. Is it painted?

Source book titled Southern Style by Mark Mayfield
IMG_0005

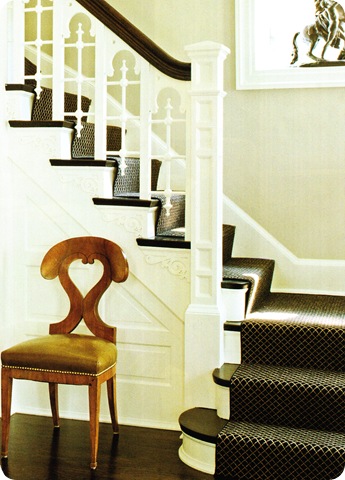
^More design elements for the outside of the riser.

Source: Traditional Home October 2006^

IMG_0007

In the photo above is a combination of designs on the outside riser /face string.

IMG_0011

^Instead of the staircase railing ending with a newel post as shown in the photo below, in the photo above, the railing makes a grand ending with a tapered wrap around design.


IMG_0004

IMG_0093

Above, the newel post ends up being just another spindle or baluster.

Photography by George Cott^

IMG_0010

Source: Southern Accents March/April 2008
IMG_0009

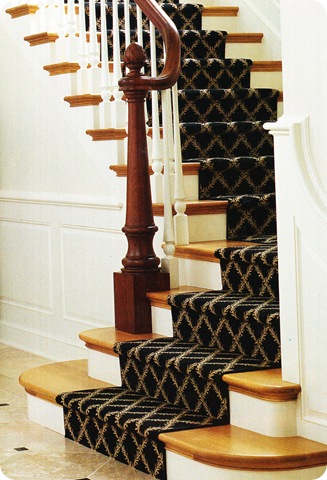
In the photo above, the newel post is located before the last step. Below it is positioned at the end of the last step on the floor with the entire post showing. In the second photo below even though the newel post is on the floor, it is positioned as part of the first step. As you can see, there are many options for newel post design and positioning.

Source: Beautiful Homes Winder 2005

IMG_0003

Source: Traditional Home Holiday 2008

IMG_0094

In these last two photos below, the bottom of the spindles or balusters are attached to a rake wall or knee wall cap (I have heard both terms).  In previous five photos the spindles or balusters are attached directly into the tread or step because it is an open       string(er) and there is no rake wall or knee wall.  You have the option of having an open string(er) in which the tread or step of the staircase is open on the side or you can have a closed string(er) in which there is a rake wall or knee wall or as I call it a “curb” on the side of the tread.  I know all of this lingo and terminology can be daunting. Often there are two terms that mean the same thing depending on what area of the country you live.  That’s why I like to present photos and illustrations which are a great tool in helping a client to explain what they want and then the experts can provide the correct terminology.
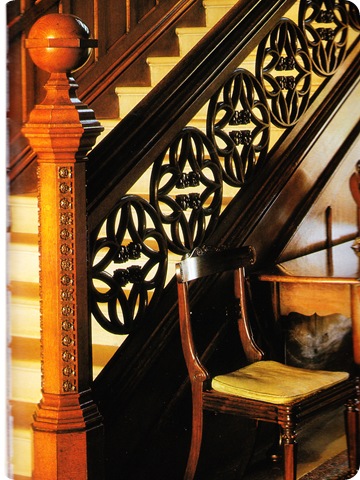
IMG_0023


IMG_0092

Photography by Lisa Romerein^

Thanks for visiting. I hope you have enjoyed the newel posts and other design elements. Please let me know what you think.  The final post of the staircase series will be the Mistakes to Avoid. My goal is to post it on Monday or Tuesday. 

The source of many of the photos shown is unknown. If you will contact me with the source I will add it or delete the photo.